Pages

Showing posts with label Sponging technique. Show all posts

Friday, 11 May 2012

Watch the Birdie!!

My heating engineer has only just left ( 5.22pm ), thank goodness I didn't have anywhere important to be today!!

While waiting for him I had chance to do another card.


 It's for the Clean and Simple challenge where they have this sketch


and CAS-ual Fridays where they want to see feathered friends


 This is what I made


 I still had my blue and green inks and sponges on my desk so I sponged a label and layered it on a dark green one. I then stamped and coloured the dovecote on some white card, cut it out and stuck it on the label. I then stamped the white doves in grey ink, cut them out and added them to the picture, with the flying dove on 3D pads overhanging the scene. The sentiment was added, and the whole thing was added to some green card that had been embossed. Simples!!!


Here is a closer view of the white doves. I have softened them with an Aqua painter and some grey ink. I tried stamping them in black at first, but they looked too severe so I used the grey.


Recipe :
Card = Garden Green, Green Galore, Very Vanilla, Whisper White, and cream card base FMS
Stamps = Flower Soft and SU Basic Phrases
Inks = Pool Party, Bashful Blue, Certainly Celery, Sahara Sand, and Basic Black
Tools = Big Shot, Nestabilities, Budding Vine embossing folder, and Aqua Painter
Extras = 3D pads


That's it for today, Thanks for looking and I hope to be back tomorrow?


Thursday, 10 May 2012

White Flowers

Today's card is for the Make My Monday challenge where the they want to see Lily of the Valley or White Flowers


Here is my card that I'll be entering


and this is a view of it open


The daisies and sentiment were stamped in Versamark and heat embossed with white powder, and then blue and green ink sponged over them through a label Nestabilitie hole. The die cut daisy was sponged in the centre and at the ends of the petals in green and raised on 3D pads so it can hold the card closed.


Recipe :
Card = Clarity silk card, Pear Pizzazz, Whisper White, Wild Wasabi, and white card base FMS
Stamps = Upsy Daisy and My Friend
Inks = Versamark, Bashful Blue, Certainly Celery, and Old Olive
Tools = Big Shot, Nestabilitie, Shapeabilitie, Corner rounder, and Heat gun
Extras = Ribbon, 3D pads, and White embossing powder


Another rainy day here, but things can only get better, especially as there's a Grand Prix this weekend. So I hope you have a good time what ever you are doing.

Thanks for dropping day today


Tuesday, 24 April 2012

Puppy Birthday

I've not had much time to myself today, but I've had to find time to made a quick card to give to my  sister tomorrow for her neighbour's son Mark, who is having a Springer Spaniel for his birthday at the weekend.

I've combined several challenges to make my card, the first is Clean and Simple who gave us this sketch,


and the second is Make My Monday challenge where their theme is Men and Boys with Birds or animals.


This is the result and I hope it is manly enough?


I cut 5 different sized coloured card circles with the Big Shot and Nestabilities, and stamped the images on them in Chocolate Chip. I used an Aqua Painter to spread the ink and added the odd touch of colour with SU Write Markers ( Well of course SU had to sneak in somewhere!). These were arranged on some DSP with a central pastel green panel that was stamped with the sentiment.

I hope my sister thinks it will be ok, and more importantly, that Mark will like it?


Recipe :
Card = Gable Green, Very Vanilla, Daffodil Delight, Pretty in Pink, Bashful Blue, Pear Pizzazz, Whisper White, and a cream card base from my stash ( hidden under the DSP )
Stamps = Daisy and Dandelion, and Verve sentiment
Inks = Chocolate Chip, Soft Suede, Bermuda Bay, Poppy Parade, Melon Mambo, Crushed Curry, Certainly Celery, and Sakura Gel/Glitter pens
Tools = Big Shot, Nestabilities, and Aqua Painter

That's me for done for now, and I hope to be back soon.

Thanks for stopping to look at my blog.


Thursday, 1 March 2012

Romance and Diamonds

Today, I've finished the card I started at Jacqueline's on Tuesday, that I was making for the Make My Monday challenge where the theme is still Romance, and this week they are looking for Flourishes and Diamonds.


Here is my card


The heart flourishes were stamped in Versamark and heat embossed in gold and the hearts cut out by hand ( I must get a set of heart dies) with the one in the front raised on 3D pads. The rose buds are a spiral circle rolled up with a pink diamond bead in the centres, and the leaves were made with the SU Bird punch in white card and coloured with the green SU Write Marker. The sentiment "always" was  part of a stamp from Whimsical words, and the "love" was written by hand, with a diamond in place of the O.

Recipe :
Card = Very Vanilla, Whisper White, Cherry Cobbler, and cream card from stash
Stamps = Always Elegant, Baroque Motifs, and Whimsical Words
Inks = Versamark, Old Olive, and Cherry Cobbler
Tools = SU Bird Punch, and heat gun
Extras = 3D pads, pink diamond beads, diamante gems


Thanks for looking today.


Sunday, 19 February 2012

Hello Flower!

Today's card is for the Less is More challenge where Mandi and Chrissie want us to use PUNCHES OR DIE CUTS

I need a Birthday card for my friend, who calls everyone "Flower", So out came my beloved Big Shot, and here is what I came up with


Recipe:
Card = Pumpkin Pie, Daffodil Delight, So Saffron, Pear Pizzazz, and cream card from my stash
Inks = Pumpkin Pie, Wisteria Wonder, Lovely Lilac, and TH Tea Dye
Stamp = Verve
Tools = Big Shot, SB Shapeabilities Daisies, Marianne vine, and SU Butterfly Punch
Extras = 3D pads and Lilac gems


The pansies were made by punching out 2 butterflies, sponging the edges with lilac, and then sticking them together, the centres were darkened with a write marker and a gem added for some bling. Once the daisies were cut, I sponged through the die to add some shading to the centres and petals before removing the metal.


I hope she likes the bright colours.

Hope to be back again soon, and thanks for dropping by


Saturday, 18 February 2012

Happy Birthday


Today's card is for 2 challenges.

The first is Stampin Royalty where they have this sketch


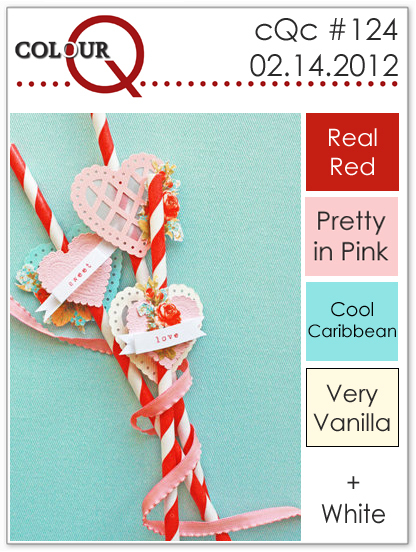
and the second is ColourQ where they have this colour palette


Here is my card


Recipe :
Card = Very Vanilla, Real Red, Pretty in Pink, and cream card from my stash
Stamps = Baroque Motifs, Ornate Flowers, and Verve
Inks = Real Red, Pretty in Pink, and Pool Party ( I don't have Cool Caribbean )
Tools = Big Shot, Nestabilities, Cuttlebug Swirl embossing folder, Martha Stewart border punch, and Readicut 2 step flower punches
Extras = 3D pads and white Pearl gems


I wasn't too sure about the blue flower stems and Baroque Motif at first, but I think because they are so pale they can pass as bluey green foliage. What do you think??

I've had a terrible few days............On Thursday night, I found my old neighbour ( a widower who is on the verge of  Dementia) in a Diabetic coma again and had to get the ambulance out. Thankfully, he is still in hospital and the Dr.s have found more complications that I wasn't aware of, so he is now getting the right treatment he needs. I hope for his sake he will be there for a while yet, so that some Home care can be sorted out for when he comes home, as his son lives in London and there is no one else other than me.

I hope to get some more crafting done in the next few days, but who knows what will happen??

Thanks for looking today


Sunday, 12 February 2012

Love Letter

Today's card is for Make My Monday Challenge . Their theme is ROMANCE and this week it's also SCRIPT OR VERSE

 This is my card


I've torn all the cards and sponged the edges to age them, and the letter I've rolled up each end to make it look like a scroll. The Fimo wax seal has had the Postmark stamp pressed into it and then stuck down to hold the ribbon in place. I made the rose buds by cutting a circle of card into a spiral and then rolling it up, and added a pearl in the centres.


Recipe :
Card = Very Vanilla, Cherry Cobbler, and cream card from my stash
Stamps = French Foliage and Baroque Motifs
Inks = Sahara Sand and TH Tea Dye
Tools = 2 Step Bird Punch
Extras = Fimo, Ribbon, and White Pearls


Thanks for looking today and I hope you'll come back soon


Wednesday, 8 February 2012

Flower Pot cards

Hi crafters, I think I've finally managed to sort out changing all my email address and passwords everywhere now, so it's nearly business as usual. Thanks for all your patience and good will messages.

Yesterday at our Craft club we made a flower pot card, and I made mine with Mother's Day in mind.


When the flowers are pulled up they reveal the insert with the message.


I added a piece of card on the back like a photo frame to support the card to stand upright. I then made another one for my sister to give to her Mum in Law.


Most of the flowers are die cuts, but the pansies were made with the SU large butterfly punch. Two yellow shapes were sponged with lilac ink and stuck on top of each other in different directions, and the centres coloured with write markers and finished with gems.

Recipe :   Card = SU Cherry Cobbler, Orchid Opulence, Pretty in Pink, Wisteria Wonder, So Saffron, Pear Pizzazz, Very Vanilla, and Terracotta from my stash
Stamps = sentiments borrowed from Jacqueline and Joan
Inks = Wisteria Wonder, Regal Rose, Pear Pizzazz, Chocolate Chip, and TH Tea Dye
Tools = Big Shot, Spellbinders shapeabilities, CreaLies die, SU Build a Blossom and Butterfly punches, SU and Martha Stewart border punch
Extras = Ribbon, gems, and padded hearts


I hope the Mums like them?

I've not got alot of time tomorrow, but I will try to show you what else I've been up to, so please call back if you can.

Thanks for looking here today


Tuesday, 17 January 2012

Country scene

OMG!! What a nightmare I'm having with my Internet connections. Some days it's ok, then the next I have nothing...........hopefully by the end of the month I'll have a new provider and the nightmare will be over, and I can blog and comment on your blogs too. ( sorry you've not been getting them)

This is the first card that I've tried to post that I think will be ok, so fingers crossed it will be able to be published. It's for the Make My Monday challenge , where this months theme is NATURE and this week they want us to Create a Scene.

I'll also be entering it into Anything Goes challenge where Anything goes!!

Here is the scene I've made


I've used the sponging technique to create the hills and misty valley where my majestic stag is strutting his stuff!!!, and stamped the leafy branch and daisies in the foreground.

One of my New Year resolutions is to reduce the waffle in my posts, so I hope you can see what I've done and how I've done it!?!

Recipe :  Card = SU Very Vanilla, Choc Chip, and square card from my stash
Stamps = Upsy Daisy, SU Stag, Clarity tree, and my design branch
Inks = Bashful Blue, Always Artichoke, Adirondack Pesto and Espresso


I will try to post again soon so please call back if you can.


Sunday, 11 December 2011

Let it Snow!

Brrrrrrrrr!!! What a cold wet day outside, thank goodness I'm still putting my decorations up indoors. Now you may think that my house must look like Santa's grotto, but watch out for the photos at the end of my post and see for yourself.

Today, I've only had time for a quick card that is for the  Less is More challenge  and they want a 

ONE LAYER CARD
       This time our theme is
       Let it Snow!

So out came my snowflake stamps and sponges, and this is what I came up with


I stamped the snowflakes in Versamark across the top of the square card, and heat embossed them with white powder. The same was done with the sentiment. I then embossed 2 lines across the middle of the card and covered them with Post Its before sponging over the top area with blue inks. Gems were added for a little bit of bling.

Recipe :
Card = Whisper White
Stamps = Inkadinkado, and my stash
Inks = Versamark, Bashful Blue, and Brilliant blue
Tools = Heat gun and embossing tool
Extras = White embossing powder and gems


Thanks to my RA it takes me sooo long to do what takes a normal person only a few hours!!! but I think it makes my room look festive even if it does cause me pain to do it. 
Here is my traditional red tree ( and I've just noticed the strange pale patch on the dining room curtains, and if it's not the reflection of the camera flash from the large mirror, it's a ghost ??)


and this is my fireplace, minus the large red baubles (which I hang from the top of the garland swag, and I think must still be in the loft) and the coals from the fire as Monty likes to steal them and hide them under the dining table!!


Tomorrow I'm off to Jacqueline's to play and it may be my last chance to go round before Christmas, so I'd better get my crafting stuff ready.

Thanks for dropping by and I hope you'll call again soon.

Sunday, 27 November 2011

Fresh Cut Thank You

I just love Sundays when there is a Grand Prix on the TV, as my family know that I love them so much they always try to leave me alone, so it means that I can craft while sat on the sofa!!

Yesterday I went with my family to see the 3D film "Arthur Christmas" at the cinema, and as my sister paid for me, I've made her a Thank You card.

I will also be entering it into 2 challenges;


The sketch is from the Clean and Simple Challenge ,

and the colour palette is from the Color Throwdown Challenge


This is my card


I stamped the flower and text stamp on white card in brown ink, cut it into a circle and sponged the edges.The flowers were then coloured with SU Write markers and placed on a brown scallop circle made with the BS. I then drew around a plate for the dome shape on some blue card and randomly stamped the flower in red and blue on it, and the leaf sprig in brown. I stamped the sentiment frame and text in brown on white card before matting it onto brown card. This frame and the floral disc were placed on 3D pads on a square white card that had had the blue card stuck at the bottom. The finishing touch was the red ribbon.

Recipe: 
Card = Bashful Blue, Chocolate Chip, Whisper White, and white card from my stash
Stamps = Fresh Cuts and Just Believe
Inks = Island Indigo, Real Red, and Chocolate Chip
Tools = Big Shot and Nestabilities
Extras = Ribbon and 3D pads


At the cinema we had to wear the sexy specs that make 3D what it is, absolutely brilliant! , but I dont think they'll make it onto the catwalks of London or Milan anytime soon!!.We were all amazed that Nathan and Sophie sat through the whole film without a peep, in fact Sophie went to sleep!!, but if you have kids I can highly recommend this film, there are even the odd one liners for the adults!

Anyway, thanks for dropping by and I hope to be back soon.


Tuesday, 22 November 2011

A Christmas Hoot!

Yaaaayy!! I've come Top 3 at the  Simply Stampin Challenge again. I'm so pleased and must say a big "Thank You" to the DT for choosing me.

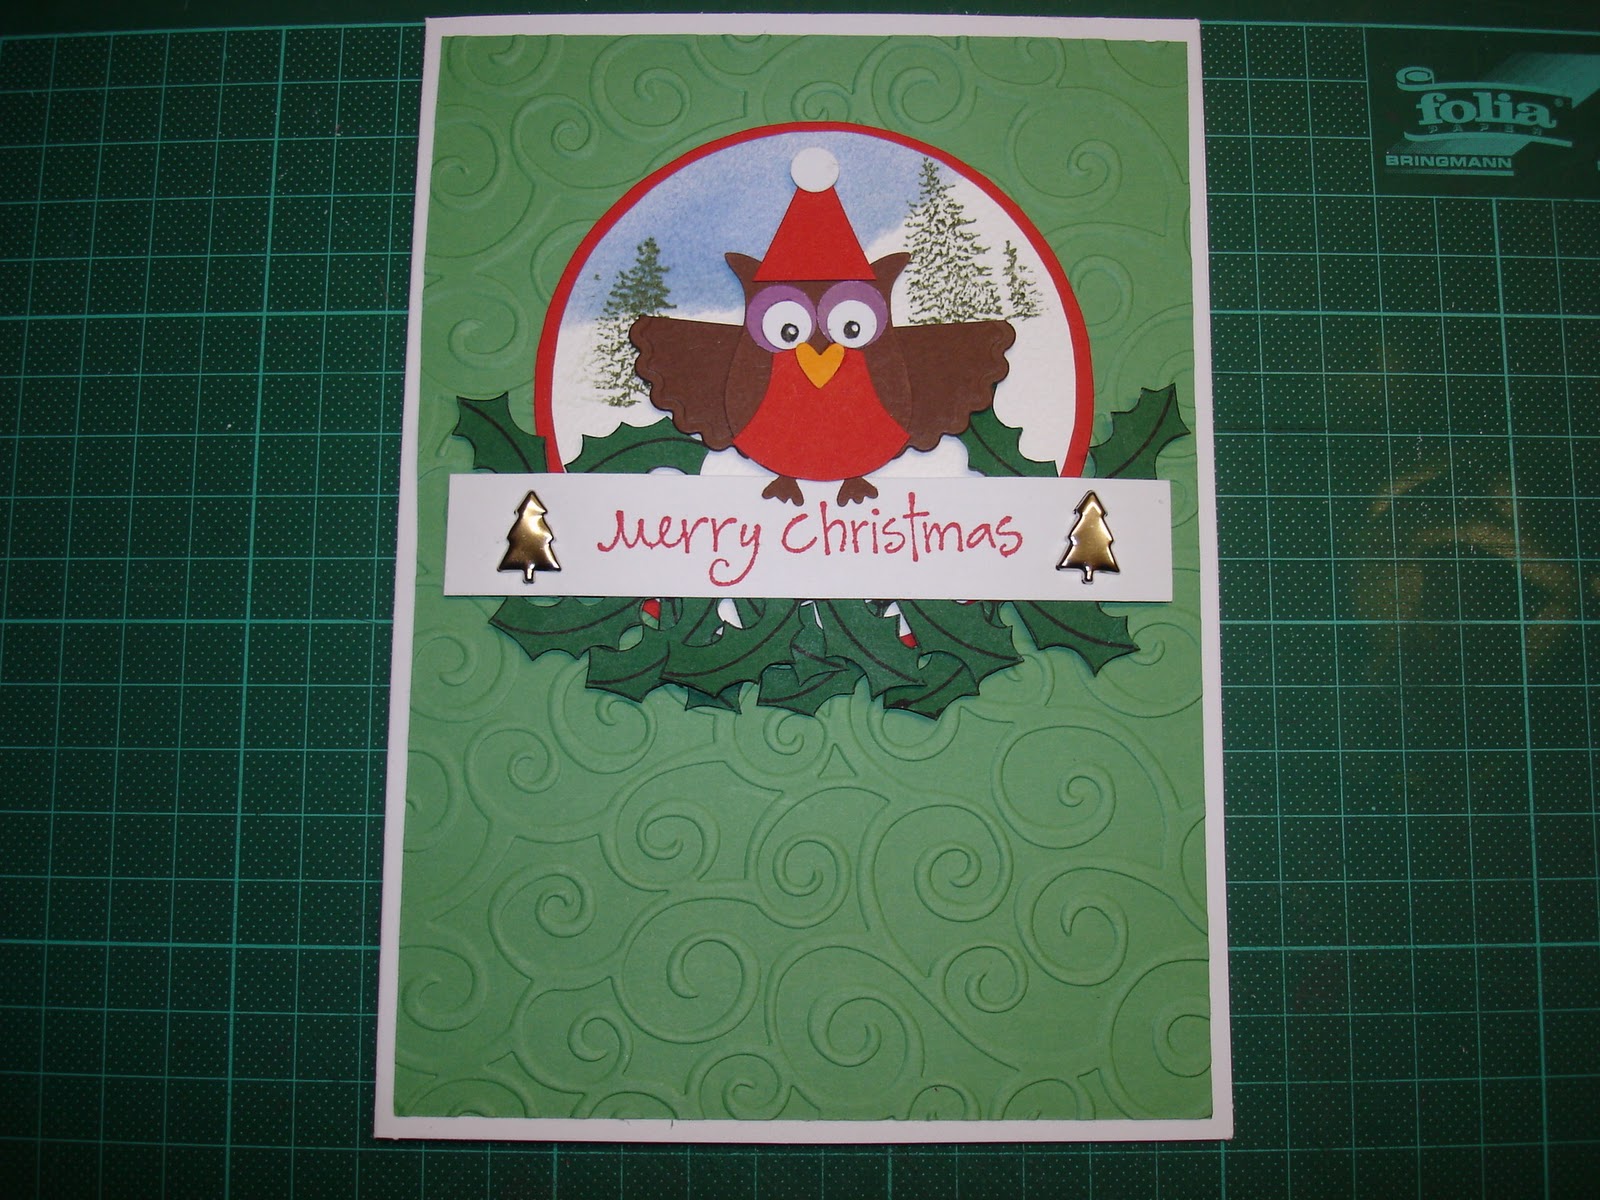
The card I've made today is for the Clean and Simple challenge #167 where they have this sketch.

I thought for a change I'd put my stamps aside and use the cute owl I made with Jacqueline's punch a while ago.


Here he is in his Santa suit, isn't he cute?


The card started with some green card that was embossed in the BS and placed on a white card. I then sponged a blue sky over a snowy hill scene on a white textured card circle, which was then matted onto a red circle. I then stamped some holly sprigs numerous times on some dark green card and cut them out to sit along the bottom of the scene. I then stamped the greeting on some white card and placed a tree shaped brad at each end. This was then raised on 3D pads for dimension and also somewhere for the owl to perch.

Recipe : Card = Wild Wasabi, Garden Green, Real Red, Chocolate Chip, Lavender Lace, Pumpkin Pie, Whisper White, and white card stock from my stash
Stamps = Dovecrafts and Docraft
Inks = Bashful Blue, Always Artichoke, Real Red, Basic Black, and White Gel pen
Tools = Big Shot, Swirl embossing folder, Owl Punch
Extras = Tree Brads


Thanks for dropping by today, and as tomorrow is my Super Hero day with Nathan,  I'll be back in a few days time.


Thursday, 17 November 2011

Joyful Robin

After a couple of busy days, I've finished a card that I started on Tuesday for the Make My Monday challenge . Their theme is to Make a CAS Christmas Card with emphasis on the Sentiment.

Here it is


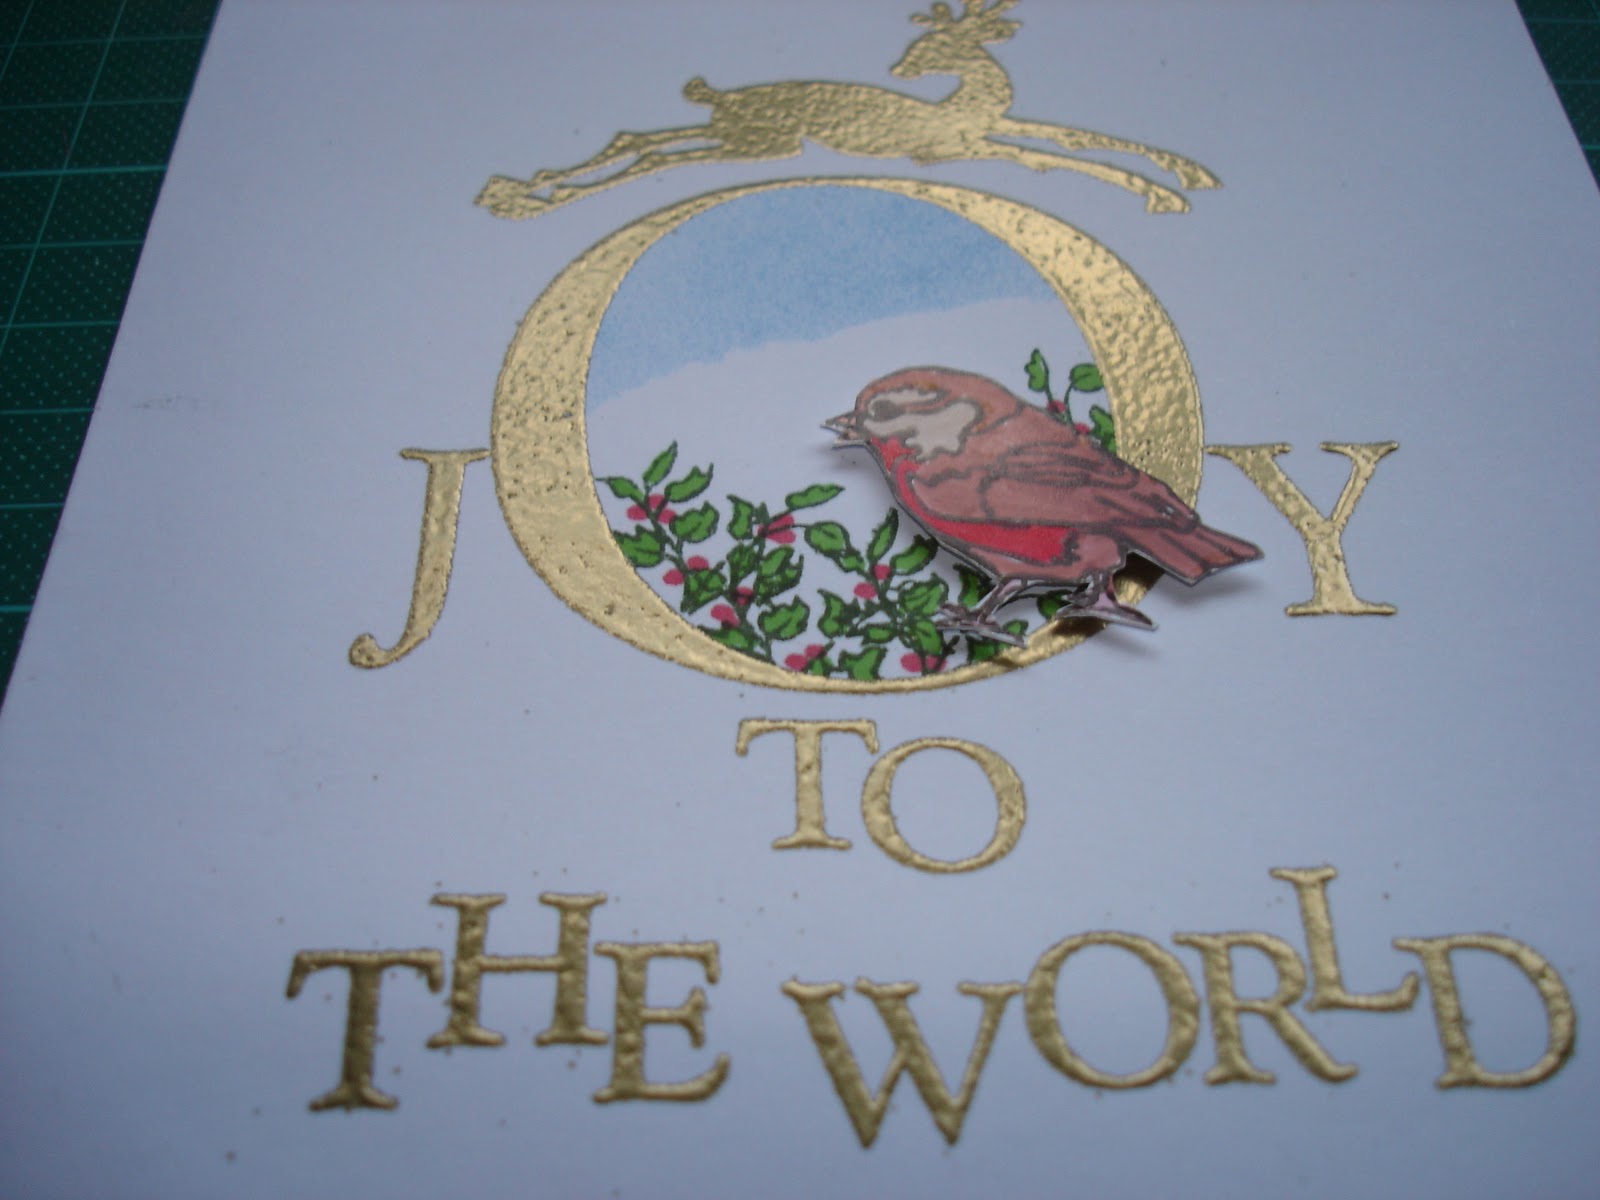
The text and jumping reindeer were Versamark stamped and gold powder heat embossed. In the center of the 'O' I sponged a blue sky over a snowy hill with holly trees in the foreground, and sat on the rim of the letter is a robin ( mounted on 3D pads ) who is looking through the hole.

 Here is a closer view of him


Recipe : Card = White card from my stash
Stamps = Clarity and Papermania
Inks = Versamark, SU Pool Party, Poppy Parade, and Green and Brown Pro markers
Tools = Heat gun
Extras = 3D pads


I must say a big "Thank You" to my lovely sister Cassy, who bought the reindeer stamp for me, together with a Santa Sleigh that I promise I'll use soon.

I hope she likes what I've made?


I must confess to Jacqueline that this is my second attempt at the card ( I started the first at her house on Tuesday! ) as I wasn't happy with the first scene, and, I dropped the holly stamp which landed in the wrong place to turn it into a "Happy accident". This card I'm much happier with.

Thanks for dropping by today, and I'd love to know what you think if you have time to leave a comment?


Monday, 14 November 2011

OLC Leafy Thank You

This afternoon I had my RA treatment injection, so now I am resting on the sofa with a throbbing leg!!

Of course I couldn't sit doing nothing, so I've made 2 cards for the Less is More challenge where they want a OLC with Leaves as the theme, and the Simply Stampin challenge where they want something Leafy.

This is the first


I masked a strip off with tape and randomly stamped some leaves with Versamark and heat embossed them with clear powder. I then sponged and stamped over them with green inks and drew a wavy line across the top and bottom of the border. I stamped the sentiment, and then heat embossed a Versamarked stamped Fern leaf that lay over the coloured area. 

and this is the second


I drew the wavy border again but this time incorporated the sentiment in the bottom line. Between these I stamped 4 suede leaves that had gold embossed highlights, and 1 brown leaf with no added extras.


Recipe :  Card = square white cards from my stash
Stamps = French Foliage, Organic Grace, and Just Believe
Inks = Certainly Celery, Pear Pizzazz, Always Artichoke, Soft Suede, Adirondack Rust, and Versamark
Tools = Heat gun
Extras = Gold and clear embossing powders

After making these I realise that I dont feel too good so may have to have a lie down. Hopefully I'll be back tomorrow, so I'll say TTFN


Saturday, 12 November 2011

Christmas is coming!!


While watching my guilty pleasure ( the Grand Prix) this afternoon I have been able to do some crafting. Yaaaaay!!

And as I promised there is no sign of my Baroque Motifs on my card today!!


I have made it for the Clean and Simple challenge where they have this sketch,

and I'll also be entering it in the CAS-ual Fridays challenge  where they want a tag or something with a tag on it.

In case you haven't noticed yet, Christmas is coming fast and so that was my inspiration for my card.

This is it


I first stamped the Christmas sentiments in red across the bottom of a white card, and put some more white card through the BS on a dotty daisy texture plate (looks like snowflakes ) and sponged the edges in red. This was placed on 3D pads to add dimension. A red and White tag were then cut in the BS and the white matted on top. On this I stamped the pick up with its load of presents and tree (using the Stamp-a-ma-jig) which were coloured with SU Write markers and Pro markers. The finishing touch was the ribbon bow to attach the tag.
I've just seen the cola advert ( the famous one in the red cans) on TV which definitely means that the " holidays are coming!!", so very soon the decorations will need bringing down from the loft and the house being transformed into Santa's grotto.

I've had a terrible morning sitting in a cold Kwik Fit garage..........I drove to my mum's yesterday and noticed that one of my front tyres pressure was very low, and when I came to drive home, it was completely flat (only at the bottom though!!??). There was no way anything could be done till today, so I was up early waiting for the RAC to come and do a temporary repair so I could drive to Worcester ( 15 miles away) for a new tyre. Thanks to all the car thieves these days, Vauxhall cars no longer have spare wheels under the car, or in the boot ( means more space for cargo, apparently?) so it left me high and dry. Thank goodness I was at mum's.

Anyway, it's all sorted now, just no more off road rallying for me!!.

Hopefully, I can do some crafting this week, so please call back again if you can.

Thanks to everyone who leaves me comments, I love to read each one to see what you think.


Vintage Christmas

Yesterday I started another card for the Make My Monday challenge as I wasn't that happy with my first entry. This time I've tried the vintage style ( way out of my comfort zone, but the more you do I suppose the better you feel about it?)

I'll also be sending it to St Lukes charity where their theme this month is Christmas.


I've used 3 papers that I'd downloaded years ago from I cant remember where.......a holly print, Hark the Herald Angels music sheet, and vintage christmas angels ( I hope they forgive me for cutting their wings off?! ) .The holly was placed on a cream card base and the edges sponged. A square was torn from the music sheet and red sponged on the edges, and then some fluffy threads were wrapped around it before it was layered on the holly. The 2 children were cut out and stuck down and then the whole thing was sponged with a distress ink. The sentiment banner was added on 3D pads with a bow of the threads dangeling behind it with jingle bells on the ends.

Recipe: Card = from my stash
Inks =  Real Red, Certainly Celery, and Tim Holtz Tea Dye
Stamps = Dovecraft
Extras = Fluffy threads and jingle bells

It's a Grand Prix weekend so I hope I'll get some crafting done.

Thanks for dropping by, and I'd love it if you could call again if you have time.