Pages

Thursday, 29 September 2011

Rockin' Robin

Phew, it's been scorchio here today, and it's supposed to get even hotter tomorrow, so I will be doing everything possible to keep in the shade.


I've had another busy day, but managed to find some time to make a card. I saw over at Kraft Journal challenge  they were asking for us to "Use a Sketch" as inspiration or CASE it.                                         Some time ago I saw this sketch at Clean and Simple challenge and loved it's simplicity, so have decided to use it.

I'm still doing the Christmas list for my friend ( and I think this is the last one?) so this is what I came up with.


 I started with a cream card and masked off an area a third of the way down with Post Its. I sponged this area with green, and then randomly stamped a pine sprig, a leaf, and holly leaves in various green inks, before drawing a wiggely gold line along the outline.  I then used the BS to cut 3 labels in cream and stuck them on the green stamped panel ( sadly the photo doesn't really show how the green makes the cream labels stand out ). I made 3 Robins with the Bird punch and stuck one on each of the labels. The finishing touch was the green stamped sentiment above the border which was put in place with my Stamp-a-ma-jig.


Recipe : Card = SU So Saffron, Chocolate Chip, Poppy Parade, and cream card from my stash
Inks = Certainly Celery, Always Artichoke, and Handsome Hunter
Stamps = Dovecraft
Tools = Big Shot and Labels Nestabilities
Extras = Gold Pilot marker

Have you noticed the middle Robin is facing the wrong way? When sticking them together I hadn't noticed he was the other way around till I came to put them on the card, but I think I like it that he is different. What do you think?

  
Today, Mum has been here helping me to clean my carpet in my lounge and dining room with a Vax machine. Our logic was that the humid weather would help to dry them afterwards, but we didn't invisage just how hot we would get doing it. Neither of us are in the best of health and both are crippled with RA, so the moaning and groaning we did would have made a hole in the Ozone layer! Still it got done, and I was glad to sit and rest this evening and do some crafting.

This weekend we will be doing various things for Nathan's 4th birthday, so I wont get chance to do anything else till next week.

I hope you all have a good weekend and can make the most of the returning summer before it disappears again.

Thanks for dropping by today.


Wednesday, 28 September 2011

Triple Layer Dandelion Wish

This afternoon I have had an hour to myself, and I've spent it unwinding and trying to craft. Again, I've struggled with where and what to start, but finally decided to hit two for the price of one with the CAS-ual Fridays challenge #21 hinting at the colours idea ( I went with shades of Green with Brown ), and Less is More challenge for the layout.


I used a cream square card as the base and stamped the sentiment in brown in the bottom corner. With the BS I cut 3 label nestabilities in 3 different green cards and layered them with the darkest at the bottom and lightest on the top. I then stamped the dandelion head in brown on the top card.


This is the finished simple card, what do you think?


Recipe : Card = SU Garden Green, Green Galore, Gable Green, and cream card from my stash
Ink = Chocolate Chip
Stamps = Personal Impressions
Tools = Big Shot and Labels nestabilities

Thanks for looking here today, and I'll be back again with some more project soon ( I hope!)


Nathan's Birthday cards

My nephew Nathan is 4 years old on Friday, so as well as the Spiderman card from me, I've made a Lightning McQueen ( from Disney's "Cars" ) and a Numberjack 4 card from his parents and grandparents.

Here they are


Nathan has been doing a lot of street dancing (well he thinks he is!!) lately and he does a move which he calls "a robot walking backwards", hence the little bird doing the same ( and its covering an ink smudge )


They are plain and simple, and I hope he likes them..........mind you he'll be too busy with his presents to care what the cards look like!!

No other cards I'm afraid, as yesterday at my friends I could not think about crafting as my mind was focusing on my poor old neighbour who still isn't well, and his son is going back to London and leaving his dad alone. I wont bore you with anymore tales of woe, but I'm not a happy bunny he's going

Hope to be back in the crafting saddle soon, and thanks for bearing with me.


Sunday, 25 September 2011

Butterfly Birthday

What a great afternoon I've had sat on the sofa watching the Grand Prix and crafting!!

I've popped over to Clean and Simple challenge #FTL159 where this week they have this sketch.


I have used my Butterfly stamps and punch to create this simple card


I started with a white card and stamped three bunches of flowers across the bottom, and wrapped 2 ribbons around the card above them. I then stamped the flowered wings of a butterfly 3 times on purple card, and 3 times on lilac card, and cut them out with a butterfly punch. These were then stuck along their bodies and staggered in 2 lines down the card. To finish, the sentiment was then stamped under the ribbon, and gems added as the butterflies heads.


Recipe : Card = SU Orchid Opulence, white and purple cards from my stash
Stamps = Flight of the Butterfly, Just Believe, and Verve
Inks = Rich Razzleberry
Tools = Butterfly punch
Extras = Purple and Lilac ribbons, and gems


Thanks for dropping by today, and I'll be back soon.


Saturday, 24 September 2011

Autumn Foliage

Today while hanging the washing out I saw that my pond had a layer of leaves floating on the surface, so out came the fishing net and a scooping I went!! I noticed their lovely combination of autumn colours, and this got my creative juices flowing for when I sat down to craft in front of the TV for the Grand Prix.


I automatically reached for my French Foliage set, and decided to use the sketch at Mojo Monday challenge #207 as a starting point.


This is my interpretation of the sketch, and I simply love the colours.


I started with a cream card and cut a squares of orange, brown, and 2 white card . I randomly stamped the white squares with the 3 leaves from the set in yellow, brown, and rust, and then the splats and postal mark in grey. The white squares were then mounted on the orange and brown cards that had had their edges roughened with my scissors, and placed at an angle on the front of the card. I then used my BS and cut 2 labels, 1 red and 1 white. The white one was stamped with the sentiment and layered on the red one  and placed off center over the squares. With my BS still out, I cut 1 red and 2 orange multi layered Flowers, curled the petals and placed them on the right side of the top label, and a brown leaf stamped onto brown card added to the left with a ribbon bow above it. The finishing touches were 3 brown leaves and gems added to the flowers.


Recipe :  Card = SU Pumpkin Pie, Poppy Parade, Whisper White, Brown and cream cards from my stash
Stamps = French Foliage and Verve
Inks = Crushed Curry, Sahara Sand, Adirondack Rust and Espresso
Tools = Big Shot, Labels Nestabilities, and Crealies flowers
Extras = Gold ribbon and gems.


Thanks for dropping by and I hope you like my card, and I would love to hear what you think if you have time to leave a comment.

I plan to do more crafting tomorrow, so call back if you can.


Friday, 23 September 2011

Spiderman Pop Up Birthday

Today I've not had any time to do anything but finish my Spiderman card for Nathan's birthday next Friday. I have downloaded pictures of Spiderman's head and one of him in swinging action, onto white card from a free Film Characters web site, and coloured them in with Pro markers before cutting them out.


I folded an A4 white card in half for the card base and stuck the head on the front. I stamped the letters of Nathan onto coloured card bits and cut them out, and stamped Happy Birthday all to the side of the head, with a number 4 in the middle. I then cut 2 SB Lotus Pendants in the BS in black card and stuck them on so that they would suggest spiders webs ( well hopefully anyway!)


Inside the card I sponged the top of the back page with blue ink around a scalloped circle ( cut in my trusty BS) to look like clouds in the sky.
I then cut some grey card slightly smaller than the card base. and cut the top half into a City skyline of tower blocks, and added black Pro marker windows.( I did this freehand, which was a big mistake with my shaky hands, but it was too late to change it once I'd started ). I then cut 3 slits on the fold of the grey card and pushed them inwards against the fold. The Spiderman was stuck onto the center slit and a tower block was put on the side ones. 2 more SB Lotus shapes were cut and stuck on opposite corners as webs, from which I strung some black embroidery silk thread and fixed the ends to the hands of Spiderman so he could swing from building to building.

With this side view photo I've tried to show you the "pop up" side of the card, which also makes the city look more 3 dimensional.


I hope Nathan likes it as it's taken hours of fiddeling to put together!!

Now I'm used to playing Super Heros with Nathan, but yesterday I went into action for real!!

Yesterday afternoon, I was called around to my elderly neighbour (and widower), Gordon's house, by his visiting friend June. She was in tears because she was frightened that Gordon was dying. I went rushing around and went into Police mode ( after 20years service you never forget your training ) and did my first aid bit, put him in the recovery position, and dialed 999, and told June to make some tea to keep her occupied. I also thought we were too late to save him, but by some miracle the Paramedics arrived and brought him back!! It turned out that he had gone into a diabetic coma, and when he came back to life he told us that he hadn't been doing his blood sugar levels for a week as his little blood reader had broken!!!! I could have killed him myself when I heard that!. He was refusing point blank to go to hospital against all our pleading, so I stayed with them and tried to take their minds off the traumatic afternoon they'd had. Anyway, June had phoned Gordons son, Stuart, in London to come home, and when I collected him from the railway station I told him what the events were and that we were to take him to see his GP today, which we did. He's got to have some tests done but Stuart has to return to London, so I'm left responsible for his dad which I'm not too happy about, but I have set wheels in motion to get him some home help. I hope that he will be ok over the weekend,but they all know I'm here if they need me.


There's no rest for the Wicked!!!!

I hope you all have a good weekend, and can drop by again soon.


Thursday, 22 September 2011

Christmas Tree

I must start this post with a "Hello" and "Welcome" to my new followers, Linby and Kym, Thanks for joining my Followers and I hope you like some of what I do.

Anyway, again this week has been busy, on Tuesday at Jacqueline's, I started a card for Nathans 4th birthday, but as usual more chatting than crafting was done as another friend, Louise joined us. I will show you the card when it's finished.

Meanwhile, I made a card for the Simply Stampin challenge #25 where they have this sketch to follow.

As I'm still making some Christmas cards for my friend, I thought I'd make this card in that theme.


I started with a white square card and layered it with some bright green card that I had stamped snowflakes on in Versamark and heat embossed them in white. I then cut a strip of dark green card and did the same with the snowflakes. I cut 2 strips of red card and randomly stamped them with a fir cone sprig in dark green, and all 3 were stuck down staggering each other. I then cut white, red , and dark green labels in the Big Shot, layering the white on the red, and then on just the bottom of the green. The large fir tree was then stamped in dark green on the white label and cosmic twinkles added to the branches and centers of the snowflakes. Two smaller labels with the sentiment on were added on 3D pads for dimension, and finally a thin green bow was placed on the green label.

This is how it ended up


You cant really see the Cosmic Twinkles, so here is a close up ( which still isn't brilliant, but my RA is really bad today and my hands are shaking terribly so I hope you can forgive the poor quality pictures.)


Recipe : Card = SU Whisper White, Green Galore, Real Red, Garden Green, and white square card from my stash
Inks = Always Artichoke and Versamark
Stamps = Lovely as a Tree, Woodware, and Snowflakes ( I think came in a kit from Argos?)
Tools = Big Shot, Nestabilities Labels, and Heat Gun
Extras = White embossing powder, Cosmic Twinkles, Thin green ribbon, and 3D pads

 All my family have gone down with a flu bug, and I am desperately trying to avoid it, but after playing with Nathan and Sophie yesterday, I cannot stop sneezing and blowing my streaming nose today, so I am drinking hot honey and lemon by the bucket load. Sadly though it is not stopping me from doing the housework and washing.........if only it was "Man Flu" then I could take to my bed for a few days!!!

This post was supposed to be issued hours ago, but I've been dealing with a medical emergency nextdoor, I'll tell you all about it tomorrow

Thanks for stopping by, and I hope you can come back again soon.


Monday, 19 September 2011

OLW Christmas

This afternoon I've got nice and dirty with inks and embossing powder making a Christmas card.

I'm entering into One Layer Wednesday challenge #64 where the theme is "Colour it", where you stamp/draw an image and colour it however you like!!

And also at Less is More 1000 challenge the LIMettes are still trying for the record of 1000 entries.

So most importantly here is the card


First I stamped the words in Versamark and then added gold embossing powder, and melted it with a heat gun. Then I stamped the 2 deers either side of the text in black and covered them with a Post It mask. Another "Joy" was stamped on scrap paper and the center of the "O" cut out and placed over the embossed word. I then tore some paper and added a small circle of a Post It in the upper part of  the "O", and sponged above the torn edge with blue inks. The circle and torn paper were then removed to leave a snowy hill under the moon. I then stamped some fir trees in the foreground of the "O" and the top of one behind the hill. ( I'm sorry this is very long winded, and I am trying to keep the words down to a minimum, Honestly!) I then masked a square area over the words with Post Its, and continued to sponge above torn paper to make it look like the hills continued behind the text. I then stamped the fir trees behind the deers and hills, and sponged underneath them for shadows before unmasking the deers. The deers were then coloured in with brown pencils and felt tip pens. The finishing touch was to draw a wobbly line square around the words in gold Pilot marker.

Phew!. I hope that all makes sense to you. It's amazing that after all that work, the card is created still in only one layer!!

Recipe : Card = white card from stash
Stamps = Clarity, and pine trees I got off eBay years ago.
Inks = Versamark, SU Bashful Blue, Brilliant Blue, and Adirondack Black
Tools = Heat gun and Post Its
Extras = Gold embossing powder, brown pencils and felt tip pens.

Tomorrow I'm off for a crafting/coffee morning with my friend, so I may or may not, have anything to show you.

Thanks for stopping by today and hope you can come back another time.


Sunday, 18 September 2011

Butterfly Kisses

Here is the second card I've made today. Thank goodness for the clean and simple genres.

It uses the sketch from Clean and Simple challenge #FTL158.

I started with a white card from my stash and rounded the corners. I then ruched a lilac ribbon across the front and added a pink ribbon bow. Some lilac card was then cut into a label nestabilities and put through the BS in a Butterfly Kisses embossing folder ( this was in the candy I won at Make my Monday challenge last week), before being stuck with 3D pads on the left hand side. A smaller label was cut in pink card and the flowers stamped on it in darker pink, and the sentiment added in the same colour. A lilac butterfly was cut from the remnants of the large label and added to the small label.

This is the end result, what do you think?


You cant see the embossed butterflies very well, even with the close up, but they are there I can assure you. The butterfly on the small label is one of the large ones from the embossing folder, and it's stuck down along its body so the wings are free and can add some dimension.

Recipe : Card = SU Orchid Opulence, Lilac and White from my stash.
Ink : Rich Razzelberry
Stamps : Just Believe and Verve
Tools : Big Shot and SB nestabilities labels
Extras : Lilac and pink ribbon from my stash


I will also be adding this to the Less is More challenge so they can meet 1000 entries for their challenge this week.

Thanks for looking at my blog, I hope you saw something you liked.


Bermuda bird

Hi, thanks for looking at my blog, I hope you see something you like.

What a funny day it is again, one minute rain, the next brilliant sunshine. I think Autumn is taking a firm hold now thank goodness ( the hot weather is not good for my RA!). I have made the most of it and made 2 cards this afternoon.


The first is for Cas-ual Friday challenge where the card has to no larger than 4 x 4.

So I started with a white square card that was 4" x 4", rounded the corners, and layered it with a label nestabilitie in a green, and matted it with a white label on which I stamped the bird and flowers. I then stamped the bird onto white card and cut out the wing which was added to the card on 3D pads.
The finishing touches were the sentiment in green and gems on the flower and birds eye.


Here it is. I love this little bird and I like to add the big flourish as his tail instead of the long feather.


This is so different from the busy Steam Punk card yesterday, though each have their places in card makers hearts, this Clean and Simple is more my style.

I will also be entering this card in the Simply Less is More challenge where they are trying to get 1000 "Anything Goes" entries this week.


Recipe : Card = SU Whisper White and green from my stash
Stamps = Whimsical Wings and Verve
Inks = Bermuda Bay, Crushed Curry, and Certainly Celery
Tools = Big Shot and Labels nestabilities
Extras = 3D pads and gems from my stash


Thanks for looking today, and I would love to read what you think if you have time to leave a comment.

I'll show you the other card later.

Saturday, 17 September 2011

Monotone Steam Punk

Well its the weekend again, and in between chores I've sat and done a little bit of crafting.

I've been pondering over the theme of Steam Punk again for the Make My Monday Challege. I'm not sure why my brain goes blank at the thought, but it does!!!! Anyway, this week it was Monotone aswell, so off I went surfing the net for some downloadables, and after picking through some weird pictures I found some images that I could play with.

After getting covered in black ink and embossing powder, this is what I came up with.


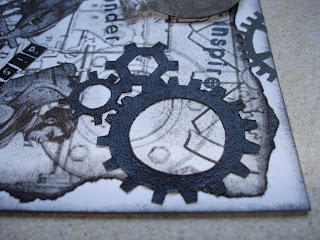
So I started with a white square card and sponged the edges with black ink. Then I tore a square out of the engineering instructions that I'd printed from the net and sponged the egdes again. On another peice of card I printed some cogs, a bird, a hot air balloon, and a man with a tank on his back???, and some cogs. All of these images were sponged, and the cogs were covered in Versamark and heat embossed to make them look more metalic, take a closer look at them


The balloon was raised on 3D pads, and the words 'inspire' and 'wonder' were heat embossed. The word 'discover' was also treated the same way, but it was cut out and placed over the background and the man. A metal washer was coloured black and stuck in the birds beak, and the finishing touch was a cut out cog placed in the bottom left corner and in the middle of the card front.


Recipe : Card = white from my stash
Ink : Adirondack black and Versamark
Stamps = Fiskars
Tools = Heat gun
Extras = 3D pads, Internet downloads, washer, and black embossing powder

Thanks for stopping by and I hope you've liked what you've seen


Wednesday, 14 September 2011

Make a Wish

I am absolutely exhausted today as I've been doing the gardening since 9.30am. It desperately needed the weeding done and the lawns had started to grow again after all the rain we've had. So 3 full bin bags later I've crashed out on the sofa in agony. My RA doesn't like gardening so my entire body is screaming with pain, even blinking hurts!!

After lying here stifly on the sofa for several hours ( watching things I've Sky +'d  and not watched ) my joints have started to move again, so this afternoon I have made a quick card for the Less is More challenge

Their theme is a One Layer Card entitled "Seeing Double" where there needs to be 2 of something.

This is what I came up with


The first dandelion was stamped with Versamark off center on a black square card and then I heat embossed it with white powder, and covered with a Post It. The second one was stamped to the right of the first and slightly lower down ( so it looks like it's behind the first), and again heat embossed. The sentiment was added at the bottom and treated the same as the dandelions.

Recipe : Card = Black from my stash
Ink = Versamark
Stamp = Personal Impressions
Extras = White embossing powder

I love dandelions and have wanted a stamp of one for ages, so I couldn't leave it at just one and tried a different colour combo. Here it was stamped in black on a cream card and green sponged around it to give depth. I think I prefer the white and black one, what about you??


Recipe: Card = from my stash
Stamps = Personal Impressions
Inks = SU Certainly Celery and Adirondack Black

While I was at my sister Cassy's on Sunday we went to the Market Harborough Arts Festival. There were lots to see and do, from circus type acts, to a drumming band ( which Cassy was part of ) , children's fairground rides, and Bric-a-Brac and craft stalls.

As I had had such a bad week Cassy treated me to the dandelion stamp and some Papermania clear 'Relations' stamps. So Thank You Cass, I hope you like what I've done with them.

I hope I will have more energy tomorrow and get back at the craft table creating something.

Thanks for stopping by and hope you can come back again soon.


Tuesday, 13 September 2011

Snowy Shaker card

Today at our craft club workshop we were making Shaker Cards, and as my friend has asked me to make her several Christmas cards for her special friends, I decided to make her one today.

Here it is in icy blue colours

I started with a white square card and masked off the area in the center with a Post It and stamped around the edges with a spotty flourish, sentiment, and several snowflakes. I then cut a smaller square out of white card and cut out the center to leave a frame, and stamped it as the base card had. Some acetate was then stuck on the reverse side of the frame and a pine tree stamped on the plain center of the card, and a small snowflake on the acetate itself. Double sided foam tape was placed around the inside edge of the frame in a double thickness layer. White beads and Mother of Pearl star sequins were placed in the center of the card over the tree, and the frame was lowered into place trapping them within the foam tape around the acetate window. A die cut snowman was added to the front of the frame to give the window scene some depth.


Here is a close up of the window so you can see the pine tree on the backing card, and a small snowflake on the inner face of the acetate window ( very feint ). When the card is stood up the beads and sequins fall to the bottom like snow would pile up under a tree.


Recipe : Card = from my stash
Ink = SU Bashful Blue and Pro markers
Stamps = Lovely as a Tree and snowflake stamps that I had in a kit from Argos years ago
Tools = Big Shot
Extras = Acetate, 3D foam tape, Sizzix snowman die, white beads, and MoP star sequins


I'm trying not to think about Christmas, but it'll soon be upon us so I'll have to get on with my cards before I run out of time.

The Wasp man is coming back this afternoon to spray the nest again as there are a few survivers of the first treatment. I hope he gets them all this time!!!!

Thanks for dropping by today, I hope you liked what you saw.


Sunflower Birthday

Here I am again, I've been busy all weekend and now I'm sat at the table wanting to craft and not knowing what to do, or where to start!!??!!  I wish my mojo wouldn't keep eluding me.


Anyway, eventually an idea started to come to me. As I still had some sun flowers left from my project the other day, I decided to use them as the starting point, and over at the Clean and Simple challenge I thought they would fit their sketch nicely. 

So, I used a cream card and masked off an inch border along the right hand edge and randomly stamped  the leaves from French Foliage in several different shades of green. I did the same to the top and bottom of a strip of white card, and sponged over these 3 areas with another green. I then added 3 sunflowers (cut by my BS) and 2 stamped leaves that I cut out, and then they were stuck down with 3D pads to give added dimension.

Here is the result, I hope you like it


Recipe: Card = SU Whisper White, Yo Yo Yellow, and cream card from my stash
Stamps = French Foliage
Inks = Handsome Hunter, Always Artichoke, Green Galore, Gable Green, and Adirondack Butterscotch and Espresso
Tools = Big Shot and SB Shapeabilities
Extras = 3D pads

Tomorrow its my craft club, so hopefully I'll have something to show you then.

I must Thank you all so much for your lovely comments about my misfortunes of last week, each one helped lift my spirits...........and now I hope that things can only get better!!!!!

You fellow Crafters are so friendly and generous with your kind words, that I feel like you are among my close friends that I have known for years, Thanks so much!!

I hope to be back soon

Friday, 9 September 2011

Rose Easel card

After such a bad week, what a lovely relaxing afternoon I've had !.

While the rain came down outside, I've sat vegging out in front of the TV with a nice Cappuccino and a bar of Nutty chocolate, creating a card for a friends birthday next week.

And Yes, I've made it with a challenge in mind, using the colours set by  the Simply Stampin challenge #23

She loves roses so here's the result ( sorry about the picture quality but it's so dark outside )


and here's a close up of the base


I started with a white square card and scored the front in half diagonally, and on the bottom triangle layered it with white, purple, blue and again white card. The top white card had been stamped lightly with some script and splats, and 2 leaves, before the edges were sponged with blue. This process was repeated for the base of the card except for the leaves. I then stamped 8 roses on some pink card and cut them out making 4 smaller for the centers of the flowers raised with 3D pads. Three roses were placed on the front in the left hand corner, and another on the base panel in the right hand corner.I then stamped 2 butterflies using blue and pink onto white card, cut them out, and placed one on the front and one on the base. The antennae were drawn with a pink marker. The base panels were wrapped in pink and purple ribbon with a bow, and a stamped panel with Just for you sentiment added with 3D pads to keep the easel up.

Recipe : Card = Whisper White, Bashful Blue, Melon Mambo, and Lavender Lace ( I haven't got any Perfect Plum )
Stamps = French Foliage, Growing Green, Strength and Hope, and Just Believe
Inks = Melon Mambo, Bashful Blue, and Elegant Eggplant
Extras = Purple and Pink ribbon from my stash ( the pink is from the Make My Monday candy prize )

As it's a Grand Prix weekend I hope to be on the sofa tomorrow, but the race will have to be recorded on Sunday as I'm off to my stepsister, Cassy's in Market Harborough.

I hope you all have a good weekend and I'll see you next week.


Steampunk ATC

Yaaaaaaaay,   OMG !!!!!  I cant believe it...........................I made top 3 over at      Make My Monday challenge  again, and I won their monthly prize of Candy.

Thank you so much DT, and a very big 'thank you' to Suzanne for the candy she donated.....not wishing to make you all very jealous, here's what the lovely prize was with the DT Congrats card


I must say Hello and welcome to Lindsay a new follower, and I hope you like some of the things you see on my blog

I'm sorry that I've been AWOL since Sunday, but you would not believe my bad luck this week. Before I bore you with my woes, I'll show you the only thing I've managed to craft so far this week.

Over at   Make My Monday challenge  their theme this month is Steampunk. I am so far out of my comfort zone with this genre it baffled me for quite a while. This week its all about an ATC, so I thought as it's small ( and I've got to start somewhere) I'd give it a go, and here is the result


I started with a cream ATC sized card and covered it in a Vintage French Automotive patterned paper. On this I stuck a torn picture of the French Auto club poster after sponging the edges with distress ink.
I then added a female image and 2 old Vintage racing cars. A wooden cornice was stamped and heat embossed, as was the word 'discover', and some little metal cogs were added to give the ATC some dimension. I hope you like it?

Recipe : Card = Cream from my stash
Inks = SU Basic Black, Versamark  and Tim Holtz Tea Dye distress pad
Stamps = The Paris stamp from French Foliage, Strength and Hope, Fiskars
Extras = Design papers I've had in my stash for years, Black embossing powders, and little cogs I found in the garage??


Now the boring details of my bad week. ( please skip the next rambling paragraph if you don't want to be bored rigid)

Monday was not good as I was still feeling frail after my treatment, and was a weak as a kitten. Then it all started going wrong on Tuesday when I got stung by a wasp right in my cleavage. Not only this, but it stung me while driving and I flicked the body away but didn't see where it went, so I stopped the car and got out ( almost getting knocked down by a speeding motorbike) shaking my top in order to find the angry insect, but to no avail. On arriving at my friends a few minutes later, I again was searching my clothing outside her house and spotted the wasp...................OMG, it had fallen between my boobs and was buzzing angrily at me from the bottom of my bra!!!???  So picture this.........there I was clothes awry with my hand down my bra retrieving this insect with a tissue, when my friends husband came out to help carry my craft bags in!! I could have died with embarrassment on the spot! Anyway, then satisfied that my attacker was now dead, I went in and sat gossiping and drinking coffee as usual for a Tuesday, all the while the sting was getting more painful and becoming a red inflamed lump. ( I must explain here, before you think me a terrible drama queen, that because of my  RA treatment I have no natural immune system, and my body cannot fight infections OR STINGS like a normal person). As the day went on the lump got bigger and more painful, so when I got home I saw my neighbour Gordon ( my elderly neighbour whom I take shopping every Tuesday ) and blamed him as he has a wasps nest in his garden. However, while stood talking to him I saw some wasps fly to and from my roof!!!  cutting a long story short, there was a very large nest in MY loft, and when my step dad Dave, got up there to see what was going on, he got attacked by a swarm of the insects, but luckily not stung. So pest man was contacted and Monty shifted off to mums so he wouldn't get stung, as by now they were very annoyed that someone had disturbed their peace. Wednesday, the pest man did his thing with his powder ( and I now need a bank loan to pay his bill) and I went off to my sisters to fetch mum. En route, I stopped at my friends in Worcester to give her some stuff that I'd ordered for her online ( she's a technophobe and wont touch computers) and while reversing off her drive, my car had an argument with a little low wall, and lost!!! AAAAAARRRGGGHHHH.  Yesterday I went back to hospital to see the Rhuematology practice nurse and it was confirmed that my treatment is no longer effective, so I am having to start a new IV drip from USA as soon as possible, so I'm waiting for an appointment!! Then lastly, this morning I see that there are still wasps going in and out of my loft so the pest man has got to come back, but cant until Monday, so no windows open and no going out for Monty unless he needs to ( do his business, that is). My lump has gone down now but has left a big bruise which looks like a love bite and is more embarrassing then the red lump!!!!!

Phew, that took some typing!!

I'm going for a lie down in a dark room now, and hopefully I'll be back in the crafting saddle soon.

Thanks for dropping by