Pages

Showing posts with label It's Your Birthday. Show all posts

Wednesday, 24 April 2013

Masculine Monochrome card

Today, I'm baby sitting, and while Sophie is having a little snooze, I've finished my card I started yesterday at Jacqueline's house. I've made it for my friends sons birthday, and I'm going to enter it in two challenges.

The first is Dynamic Duos with these colours, plus the dessert option of a masculine theme.

The second is Make My Monday with a theme of

            FANCY FOLDS

This is it, it's a swing card
                                         
                                     
I made the base with White card, and matted it with a dark grey before another matt of White. Using Black I stamped the bicycle and sentiment on the centre panel, the birds on the small segments, and the floral borders on the sides. The last things were the two butterflies in grey and white.

Supplies :
Card = Naturals White, and dark grey card FMS
Stamps = Clarity Bicycle, Bliss, Vintage Vogue, and Verve
Inks = Black
Tools = Stamp-a-ma-jig, and Elegant Butterfly punch
Extras = Hand cut small Butterfly

Thank you to all of you who have sent me kind wishes for poor little Henry, I will pass them on to my Sister.

I'd better go as I can hear little footsteps upstairs, bye for now


Monday, 18 March 2013

Coral Tree

My card today is for two challenges.

Addicted to Stamps with this sketch

and
The Play Date Cafe with these colours
Black, White, and Coral


This is my card


I stamped the image in black Archival onto white silk card, and coloured it with a coral Write Marker. I then randomly stamped two leaf stamps on some coral card in black, and then layered this onto black card. The tree stamp was also layered on black card and placed in the centre of the card on 3D pads. The sentiment and leaf were stamped in the same way and put through the Big Shot with a Nestabilitie, before being placed on the card with 3D pads.

Supplies :
Card = Calypso Coral, Black, Clarity White Silk card, and White card base FMS
Stamps = Leaves of a Tree, Lovely as a Tree, and Verve sentiment
Inks = Black Archival and Calypso Coral
Tools = Big Shot and Nestabilities
Extras = 3D pads

I've got to rush now as I'm taking my neighbour to the garage to MOT his car, but thanks for looking.

See you soon


Saturday, 9 March 2013

Fallen Leaves

Hi All, This is my second post for today as I may not have time to post tomorrow.

My card is for two challenges,


Firstly, Friday Mash Up who are celebrating their 100th challenge by allowing us to chose any from their last 100 challenges, and I chose #83.

and secondly, Color Throwdown with these colours  


This is my card


I started by making five labels with the BS, and stamping them with text and splodges. These were then stuck onto Coral card with sponged edges. I used Write Markers to colour the leaf stamps with two colours and stamp onto white card, then cut them out, and placed them on the labels.


For the central label, I added three different leaves and added it on 3D pads. The sentiment was also stuck on 3D pads.

This is a closer view of the text and splodges under the leaves.


Supplies :
Card = Calypso Coral, and White card FMS
Stamps = French Foliage, and Verve
Inks = Crumb Cake, Pool Party, Calypso Coral, and So Saffron (instead of Barely Banana)
Tools = Big Shot, Nestabilities, and Stamp-a-ma-jig
Extras = 3D pads

Thanks for looking at my card, and I would love to know what you think of it if you care to leave a comment.

Enjoy the weekend


Saturday, 26 May 2012

Doggy Birthday

This is the birthday card I made for my step sister Cassy, whose special day is today. I couldn't post it until now or she would have seen it. She has recently become a mum to a rescued brindle greyhound called Mutley, hence the doggy card.


Recipe :
Card = Tempting Turquoise, Daffodil Delight, Pear Pizzazz and Whisper White
Stamps = Inspired by Nature and Verve
Inks = Tempting Turquoise, Bashful Blue, Certainly Celery and TH Tea Dye
Tools = Big Shot, Nestabilities, Shapeabilities, Die Monde Dog die, and Readicut flower punch
Extras = Ribbon and 3D pads

I've been so busy over the last few days, what with the Olympic Torch running through the town, trip to the Safari Park, and 2 Birthday parties, so I haven't had any time for crafting.


I have, however, had time to photograph the Candy I have on offer, so please read the following post for rules of entry

More crafting may come this week so please call again, and Thanks for stopping today.


Saturday, 19 May 2012

Filigree Birthday


Today I've combined two of my favourite challenges for my card,


the first is this sketch from Mojo Monday


and the second is the cool colours from ColourQ


This is the end result


The first thing I did was stamp the filigree pattern in green around the edge of a white card and circle. I then embossed some blue card through the Big Shot and wrapped some grey ribbon around the top and added a bow. The stamped flowers were cut out and arranged on the raised up circle with 2 up on 3D pads, and leaves and sentiment added.


Recipe : 
Card = Tempting Turquoise, Basic Grey, Whisper White, and White CB from MS
Stamps = Vintage Vogue and Verve
Inks = Tempting Turquoise, Wisteria Wonder, and Lucky Limeade
Tools = Big Shot, Nestabilities, Cottage Floral EF, and Stamp-a-ma-jig,
Extras = Ribbon and 3D pads

Today has been another grey wet day, and the cool air has played havoc with my front teeth which are wobbling, and I fear that I may have to visit the dentist soon. I will delay this torture for as long as I can stand the pain as I hate going!! So it could be soup and soft foods for a day or two


Anyway, thanks for looking at my blog today, and please call back again when you get a chance.


Sunday, 19 February 2012

Hello Flower!

Today's card is for the Less is More challenge where Mandi and Chrissie want us to use PUNCHES OR DIE CUTS

I need a Birthday card for my friend, who calls everyone "Flower", So out came my beloved Big Shot, and here is what I came up with


Recipe:
Card = Pumpkin Pie, Daffodil Delight, So Saffron, Pear Pizzazz, and cream card from my stash
Inks = Pumpkin Pie, Wisteria Wonder, Lovely Lilac, and TH Tea Dye
Stamp = Verve
Tools = Big Shot, SB Shapeabilities Daisies, Marianne vine, and SU Butterfly Punch
Extras = 3D pads and Lilac gems


The pansies were made by punching out 2 butterflies, sponging the edges with lilac, and then sticking them together, the centres were darkened with a write marker and a gem added for some bling. Once the daisies were cut, I sponged through the die to add some shading to the centres and petals before removing the metal.


I hope she likes the bright colours.

Hope to be back again soon, and thanks for dropping by


Saturday, 15 October 2011

Not Halloween

Today I am entering my card into several challenges. 

The colours are from ColourQ #106, and the lay

 out from Mojo Monday challenge #210,  and over

at The Kraft Journal #40 they are looking for Die Cuts.


This colour pallet is not easy for us Brits that don't celebrate or send Halloween cards, but I thought I'd have a go anyway.

Here is my card


I started with some grey card which I put through the Big Shot in an embossing folder, and then sponged the raised pattern. I used a border punch on some black card, wrapped it with some grey ribbon and bow, and added it to the top of the grey card. A strip of black card separates the embossing from the plain card. I stamped the frame in orange on white card, and added some two step roses and leaves, with a black sentiment, and stuck it down on 3D pads. The main feature is the yellow die cut butterfly in the center.

 
Recipe : Card = Basic Black, Basic Gray, Whisper White, and Crushed Curry
Stamps = Baby Blossoms and Verve
Inks = Basic Black, Crushed Curry, and Only Orange
Tools = Big Shot, Martha Stewart Punch, and Marianne Butterfly die
Extras = Ribbon and 3D pads


This morning my friend Jacqueline held a Stampin Up party, and our demonstrator, Paula, let us have a play with some of the new stuff from the latest catalogue, and this is the card we made.

I've ordered more than I should have, but crafting is my only vice ( honestly it is!!!) and I can't wait till it all arrives.

Thanks for looking at my blog today, and I hope you can come back again


Thursday, 6 October 2011


Well the weather has changed yet again! What is going on???

Nevermind, it's a good excuse to do some crafting instead of anything else. So, today I have played along with the Mojo Monday challenge #209 and followed this sketch.


This is my card


To make it, I stamped a white card with green leaves and sponged the edges with the same green. I then used a border punch on some blue card and stuck it along the edge of some green card which was added to the stamped card. Some blue card was then put through the BS with a labels nestabilities and then again in an embossing folder. While the BS was out I also cut a scalloped and a plain circle in dark and light blue.The label was stuck on the green card, and then a ribbon was added across the top left corner and secured behind the stamped white card before all was stuck to the cream base card. A sentiment was stamped on the circle which was layered on the scallop circle, and some stamped flowers and leaves were mounted on the shape to give dimension.


This is a close up of the flowers and sentiment on the circle labels.

I used my Stamp-a-ma-jig to stamp the darker blue on the light blue of the flower spray behind the roses.


Recipe :  Card = Green Galore, Whisper White, Bashful Blue, Pacific Point, and a cream card from my stash
Stamps = Baby Blossoms and Verve
Inks = Green Galore, Certainly Celery, Brilliant Blue, Bashful Blue, and Tempting Turquoise
Tools = Big Shot, labels and circles nestabilitiues, and Martha Stewart border punch

I went round to my friends this afternoon and started to make a card for another challenge. I've used the "resist method" on it and its nearly finished so I'll post it tomorrow. Pop back then if you can to find out what this technique is if you haven't heard of it before.


Sunday, 18 September 2011

Butterfly Kisses

Here is the second card I've made today. Thank goodness for the clean and simple genres.

It uses the sketch from Clean and Simple challenge #FTL158.

I started with a white card from my stash and rounded the corners. I then ruched a lilac ribbon across the front and added a pink ribbon bow. Some lilac card was then cut into a label nestabilities and put through the BS in a Butterfly Kisses embossing folder ( this was in the candy I won at Make my Monday challenge last week), before being stuck with 3D pads on the left hand side. A smaller label was cut in pink card and the flowers stamped on it in darker pink, and the sentiment added in the same colour. A lilac butterfly was cut from the remnants of the large label and added to the small label.

This is the end result, what do you think?


You cant see the embossed butterflies very well, even with the close up, but they are there I can assure you. The butterfly on the small label is one of the large ones from the embossing folder, and it's stuck down along its body so the wings are free and can add some dimension.

Recipe : Card = SU Orchid Opulence, Lilac and White from my stash.
Ink : Rich Razzelberry
Stamps : Just Believe and Verve
Tools : Big Shot and SB nestabilities labels
Extras : Lilac and pink ribbon from my stash


I will also be adding this to the Less is More challenge so they can meet 1000 entries for their challenge this week.

Thanks for looking at my blog, I hope you saw something you liked.


Friday, 26 August 2011

Punched Peacock Side Step

Well that's nearly another week gone, and I've still not had any real time for crafting!!

Hello to my new follower Helen T, how spooky is it that you and my last joinee are both Helens??  Anyway, you both are welcome and Thanks for becoming a follower.

I have had a go at the Simply Stampin challenge though. They call it "Punch it Up", and requires using punches in the design.

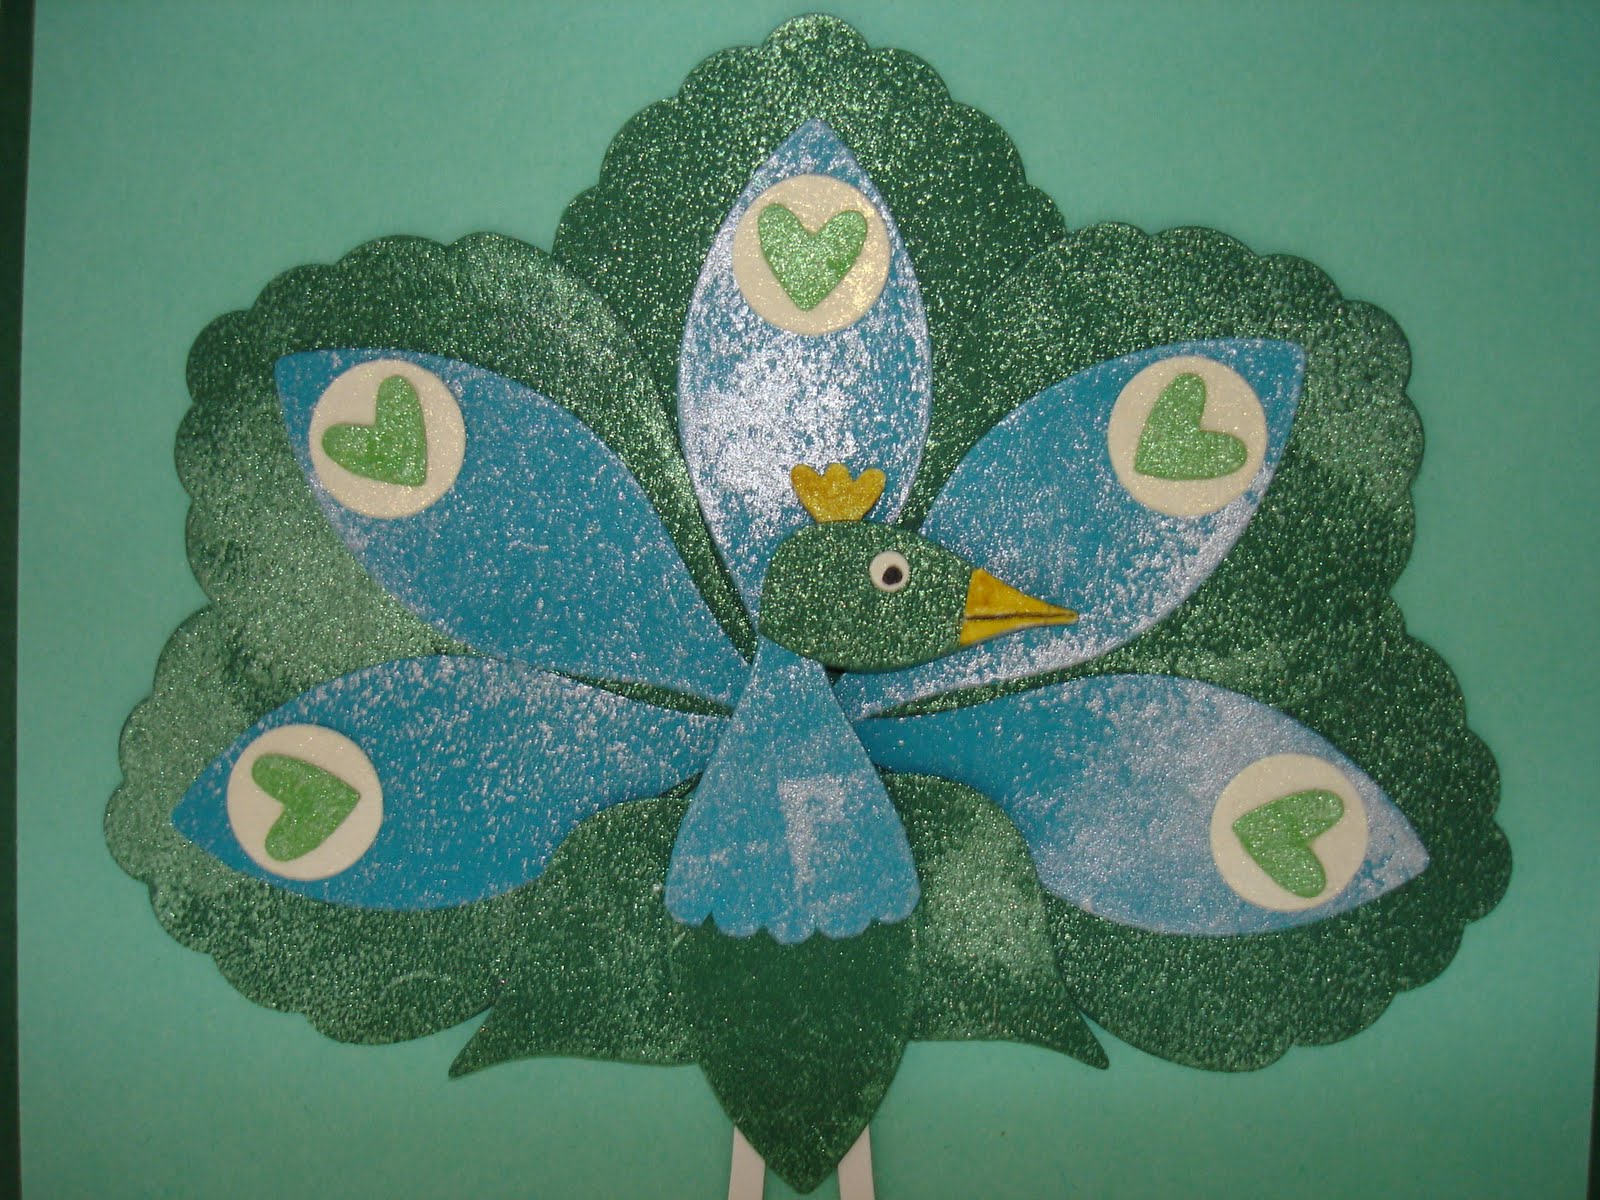
After a long think, and ignoring the urge to reach for my Big Shot, I decided to use my Blossom Petals punch to make one of my favourite birds, a peacock.

Here's what he turned out like


I started with a cream card from my stash, scored, cut and folded a strip at the side to make the side step. I mounted some aqua coloured card from my stash onto some Garden Green to create the front and 3 side panels.I then used my blossom punch to cut 5 large petals (for the tail), 1 long petal (for the body), 2 plump petals( for the wings), and 1 small petal ( for the head) from GGreen. 6 long petals were punched out of Taken With Teal, 5 for the tail and 1 to be cut in half for his neck and breast. I then used a borrowed Owl Punch ( Thanks Jacqueline) to punch 5 Whisper White circles ( Owls eyes) and 5 hearts from stash card, and one Crushed Curry Owl was cut up to make the legs, head crown and beak. The white eye came from the Owl punch and I drew his pupil with a black pen. Before sticking together I sponged each petal with Archival Opalite Cypress Frost and Sterling Frost, to try to give the bird the shimmery tinge to the feathers that the real peacocks have. It didn't quite work as I'd hoped, but I've run out of time before the challenge closes, so I hope to try the peacock again soon. The body was stuck with 3D pads to give him more dimension.

Here's a close up of the Opalite on the petals/feathers


The side panels were stamped with a Verve sentiment and a Peacock feather which I had designed and had made for me by TandaStamps. in Handsome Hunter, and coloured with a white gel pen and Bermuda Bay SU marker.

Recipe : Card = SU Garden Green, Taken with Teal, Whisper White
Punch : Blossom petals and 2 step Owl
Inks : Archival Opalites in Sterling Frost and Cypress Frost, Crushed Curry marker, and Handsome Hunter
Stamps : Peacock Feather and Verve sentiment
Extras : 3D pads and White gel pen

Right, I've minutes before the challenge closes so I'm rushing off to get this posted but I'll be back soon.

Thanks for dropping by, and I'd love your comments on my bird if you get a few seconds spare.